Cracked screen replacement is a common issue, and understanding the process from cost analysis to DIY guides can save you money and time. This guide explores various aspects, from identifying the damage to choosing the right repair method, considering professional shops, mobile repair services, and even DIY options. We’ll cover everything you need to know to navigate this process effectively.
This comprehensive guide dives deep into the world of cracked screen replacements, providing a clear and actionable path through the process. From the initial assessment of damage to the final steps of repair, you’ll find valuable information to make informed decisions about your device’s future.
Cost Analysis of Replacement
Cracked phone screens are a common issue, and the cost of replacement can vary significantly depending on several factors. Understanding these factors allows users to make informed decisions when faced with a broken screen. This analysis provides a breakdown of typical costs for various repair methods and phone models, helping you estimate the expenses involved.
Factors Influencing Replacement Costs
The cost of a cracked screen replacement is not a fixed number; it depends on a multitude of elements. Screen type, the complexity of the repair, and the repair method all play significant roles. The availability of parts and labor costs within a specific geographic area also contribute to the final price.
Comparison of Repair Methods
Different approaches to screen repair offer varying price points and turnaround times. Consider these options when deciding how to proceed.
| Phone Model | Repair Method | Estimated Cost | Estimated Time |
|---|---|---|---|
| iPhone 13 Pro Max | In-store Repair | $250 – $300 | 1-2 business days |
| iPhone 13 Pro Max | Mobile Repair Shop | $200 – $250 | 1-2 business days |
| iPhone 13 Pro Max | DIY Kit | $100 – $150 (parts only) | 3-5 hours (including learning curve) |
| Samsung Galaxy S22 Ultra | In-store Repair | $200 – $275 | 1-2 business days |
| Samsung Galaxy S22 Ultra | Mobile Repair Shop | $175 – $225 | 1-2 business days |
| Samsung Galaxy S22 Ultra | DIY Kit | $80 – $120 (parts only) | 3-5 hours (including learning curve) |
Cost Breakdown of Parts and Labor
The cost of replacement screens can be broken down into the cost of the screen part itself, and the labor costs. In-store repairs typically have higher labor costs, reflecting the specialized tools and expertise required. Mobile repair shops generally offer a more competitive labor rate. DIY kits offer the lowest price, but users must factor in the time investment needed to complete the repair successfully.
Factors Affecting Price Variations
Several factors contribute to the differences in pricing between different repair methods. The availability of replacement parts, especially for older models, can impact the cost. Labor costs vary significantly depending on the location and the experience level of the technician. The complexity of the repair itself is also a crucial consideration, especially for advanced smartphone models with complex screen assemblies.
Factors such as the need for specialized tools or advanced repair techniques also play a part in influencing the final price.
Identifying Screen Damage: Cracked Screen Replacement
Properly identifying screen damage is crucial for accurately assessing the need for replacement and ensuring the repair process is efficient and effective. A thorough evaluation helps determine the extent of the damage and its potential impact on the device’s functionality. This assessment is essential for accurate cost estimations and appropriate repair strategies.Screen damage manifests in various forms, ranging from minor imperfections to significant structural failures.
Understanding these different types and their associated severity levels is vital for effective troubleshooting and repair. Identifying the specific type and extent of damage guides the repair process and allows for informed decisions regarding the cost and complexity of the repair.
Types of Screen Damage
Understanding the different types of screen damage is essential for determining the severity and potential impact on the device’s functionality. Various factors contribute to the diverse nature of screen damage, including the type of material used in the screen construction, the impact forces, and the angle of impact. This understanding allows for a more accurate assessment of the damage and the required repair.
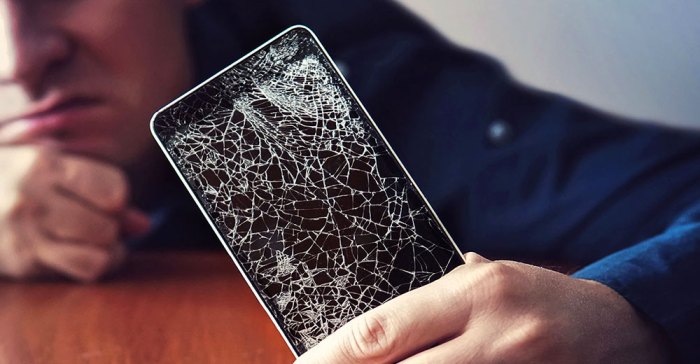
Severity Levels of Damage
The severity of screen damage directly impacts the device’s functionality and the complexity of the repair process. A minor crack might not affect functionality significantly, while a shattered screen could lead to complete device malfunction. A comprehensive evaluation of the damage’s severity is crucial for estimating the repair cost and the time required for the repair process.
Diagnostic Methods
Diagnosing screen issues involves a systematic approach that combines visual inspection with careful consideration of the device’s behavior. Visual inspection methods include closely examining the screen for any visible cracks, chips, or other imperfections. Troubleshooting steps involve testing the screen’s responsiveness to touch and input. By combining visual assessment with functional testing, you can pinpoint the nature and severity of the damage, ensuring an accurate repair.
Troubleshooting Table
| Type of Damage | Description | Examples | Suggested Solutions |
|---|---|---|---|
| Minor Cracks | Small hairline cracks that do not extend across the screen or affect its functionality. | A few fine lines on the screen, barely noticeable | Monitor for further deterioration; replacement might not be necessary immediately. |
| Chips | Small fragments of the screen material that have detached from the main screen panel. | Small, detached pieces of glass or plastic on the screen. | Replacement might be necessary if the chip is large enough to affect touch sensitivity or if there are concerns about further damage. |
| Cracks (Moderate) | Cracks that extend across a portion of the screen, potentially affecting touch sensitivity and functionality. | Visible crack extending across a significant portion of the screen. | Replacement is often necessary for moderate cracks to ensure proper functioning. |
| Shattered Screen | The screen has broken into multiple pieces, significantly impacting its functionality. | The screen has shattered into numerous fragments, compromising its structural integrity. | Replacement is almost always necessary for a shattered screen due to the significant damage and likely compromised functionality. |
DIY Screen Replacement Guide
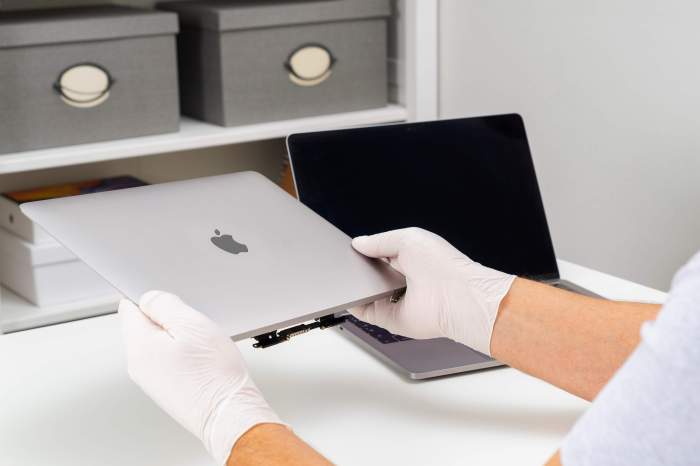
Taking on a cracked screen replacement yourself can save you a significant amount of money, but it requires careful attention to detail and safety precautions. This guide will walk you through the necessary tools, materials, and steps to successfully replace a damaged screen, while highlighting crucial safety measures to prevent further damage or injury. Proper handling of the screen and adhesive is paramount for a successful repair.Understanding the process and adhering to the safety precautions is essential for a successful DIY screen replacement.
By following these instructions, you can minimize the risk of damaging the phone or injuring yourself. This guide covers the essential aspects of a DIY screen replacement, from assembling the necessary tools to applying the adhesive.
Necessary Tools and Materials
A successful DIY screen replacement hinges on having the correct tools and materials. The following items are generally required:
- A new screen assembly for your specific device model.
- A suction cup and/or opening tools (e.g., plastic spudgers).
- A set of precision tweezers and a heat gun or hairdryer.
- A new adhesive or repair kit specific to screen replacements.
- A microfiber cloth for cleaning the phone’s screen.
- Static-free gloves to prevent dust and debris on the screen.
- Anti-static wrist strap to eliminate static electricity that can damage the screen.
- A soft, lint-free cloth to clean any adhesive residue.
Step-by-Step Procedure
Following a methodical approach is crucial to a successful DIY screen replacement. This detailed procedure guides you through the process, emphasizing crucial safety precautions and common mistakes to avoid.
- Preparation: Thoroughly clean the phone’s screen and surrounding areas with a microfiber cloth and isopropyl alcohol. Remove any dust or debris that could interfere with the new screen’s adhesion.
- Disassembly: Carefully use suction cups or opening tools to carefully pry apart the phone’s frame. Use precision tweezers to disconnect any cables or components that might be attached to the old screen.
- Screen Removal: Employ precision tweezers or a plastic spudger to carefully remove the old screen assembly. Be extremely cautious not to damage the surrounding components.
- New Screen Installation: Align the new screen assembly with the phone’s frame, ensuring it’s properly positioned. Carefully attach the adhesive backing to the screen’s edges. Apply firm, even pressure to secure the new screen. Avoid over-applying pressure.
- Reassembly: Carefully reconnect any cables or components that were detached during the disassembly process. Reassemble the phone’s frame, ensuring all parts are properly aligned and secure.
- Testing: Turn on the phone to verify that the new screen functions correctly. Test all screen functions and check for any imperfections.
Proper Handling and Application of Adhesive
The quality of the adhesive plays a crucial role in a successful screen replacement.
- Apply the adhesive carefully, ensuring it is evenly distributed across the screen’s edges. Avoid excessive pressure that might cause the adhesive to clump or bubble.
- Use a heat gun or hairdryer to carefully heat the adhesive if necessary. Heating can soften the adhesive and facilitate a better bond. However, be cautious not to overheat the phone or the screen. Maintain a safe distance and avoid direct contact.
- Remove any excess adhesive immediately with a soft, lint-free cloth.
Safety Precautions
- Power Down: Always power down the phone before starting any disassembly or assembly process.
- Static Electricity: Use an anti-static wrist strap to avoid static electricity damage to the screen and components.
- Proper Tools: Use appropriate tools for the task. Improper tools can cause damage to the phone’s components.
- Avoid Force: Avoid excessive force when using opening tools or removing the old screen.
- Temperature Control: Maintain appropriate temperatures when using a heat gun or hairdryer to avoid overheating.
- Cleanliness: Keep the work area clean to prevent dust and debris from accumulating on the screen or components.
Professional Repair Shops vs. Mobile Repair Services
Choosing the right method for a cracked screen replacement can significantly impact the cost, convenience, and the quality of the repair. Both professional repair shops and mobile repair services offer viable options, each with its own set of advantages and disadvantages. Understanding these differences is crucial for making an informed decision.
In-Store Repair Shops: Pros and Cons
In-store repair shops, often part of larger electronics retailers, typically offer a wider range of services beyond just screen replacements. This can include a broader inventory of parts and specialized equipment, potentially leading to higher quality repairs. Their established presence often translates to greater reliability and trustworthiness. However, the convenience factor can be lower, requiring a trip to the shop, and wait times can be longer, especially during peak hours.
The cost of repairs may also be higher due to overhead and staff compensation.
Mobile Repair Services: Advantages and Disadvantages
Mobile repair services offer a significant convenience advantage. A technician comes directly to your location, saving you time and travel. This is especially beneficial for individuals with limited mobility or busy schedules. Turnaround times are often faster than in-store repairs, as there are fewer steps and no need to transport the device. However, the availability of mobile repair services can be limited, and not all mobile repair technicians have the same level of expertise or access to parts.
The cost of repairs might also vary depending on the service provider and the complexity of the repair. Warranty coverage may also be less extensive than in-store options.
Warranty Coverage by Professional Repair Shops
Warranty coverage is a crucial aspect of any repair. Professional repair shops, often backed by manufacturer warranties or their own extended warranties, frequently offer a comprehensive warranty that covers the repair work. This protection reassures the customer that the repair will be addressed if there are any issues arising after the repair. The length and scope of the warranty vary, so it’s essential to inquire about specifics before committing to a repair.
Comparison Table: Repair Options
| Criteria | In-Store Repair Shops | Mobile Repair Services |
|---|---|---|
| Cost | Potentially higher due to overhead | May vary based on provider and complexity |
| Convenience | Lower due to travel | Higher due to on-site service |
| Expertise | Potentially higher due to access to equipment and staff | Can vary depending on the technician |
| Warranty | Generally more extensive, backed by manufacturer or shop warranties | May have shorter or less comprehensive warranty |
| Turnaround Time | Can be longer, depending on workload | Usually faster due to on-site service |
Screen Replacement Techniques
Replacing a cracked phone screen can seem daunting, but with the right knowledge and tools, it’s a manageable task. Understanding the specific techniques for different phone models is crucial for a successful repair. This section details various approaches to disassembling and reassembling devices, emphasizing the importance of proper tool selection and step-by-step procedures.Different phone models often require unique disassembly techniques.
Getting a cracked screen replaced can be a pain, but sometimes a little splurge is worth it. Consider treating yourself to a beautiful heart shaped diamond necklace, like the ones available at this site. The cost of a new phone screen, though, can quickly eat into any savings from a new piece of jewelry. It’s a worthwhile trade-off, though, if you value your phone’s functionality.
A meticulous approach, guided by manufacturer-provided repair guides or reliable online resources, is vital. The complexity of the repair process depends heavily on the phone’s internal structure and the type of screen assembly employed.
Getting a cracked screen replaced can be a pain, but finding the right repair shop is key. Think about it like finding the best skin care for acne – you need a solution that’s effective and tailored to your specific needs. Fortunately, there are reputable repair shops offering quality services for cracked screens, ensuring your device is back in tip-top shape.
best skin care for acne might offer some valuable insights into effective solutions. Ultimately, choosing a reliable shop is crucial for a successful cracked screen replacement.
Disassembly Techniques
Careful disassembling is crucial to prevent further damage to internal components. Different models may use different types of adhesive or bonding mechanisms for the screen assembly. Incorrect handling can damage these delicate connections. It’s essential to use gentle pressure and appropriate tools.
- Some models utilize adhesive strips, which must be carefully removed to prevent tearing or damage to the surrounding components. Precise prying tools are essential in this process.
- Other models use a combination of screws and clips. Precisely removing screws and carefully disengaging clips is vital to prevent breakage.
- For models with complex internal structures, specialized tools or techniques might be necessary. For example, certain models may require the use of heat to soften adhesives or carefully prying apart intricate components.
Specialized Tools for Screen Replacement
Proper tool selection is paramount to a successful and safe repair. Using the wrong tools can damage the phone’s internal components or cause injury.
- Precision Screwdrivers: Different screw types require different screwdriver heads. Using the wrong screwdriver can strip the screws or damage the phone’s internal components. A set of precision screwdrivers with various heads is highly recommended.
- Spudgers: These plastic or metal tools are essential for prying apart components. Choosing the correct size and type of spudger is crucial to avoid damaging the phone’s internal structure. A set of spudgers with varying widths and tips is helpful.
- Heat Gun (Optional): In some cases, applying heat can soften adhesive or loosen components. Carefully controlling the heat and avoiding overheating is essential to prevent damage.
Screen Assembly Replacement Procedures
Following a detailed guide tailored to the specific phone model is crucial. Incorrect procedures can lead to improper functionality or further damage.
| Phone Model | Key Replacement Steps |
|---|---|
| iPhone 14 Pro Max | Carefully remove the adhesive holding the display assembly. Use a suction cup and a gentle prying motion to avoid tearing the display cable. |
| Samsung Galaxy S23 Ultra | Identify and carefully remove the various screws and clips securing the display assembly. Ensure the display cable is not damaged during the removal process. |
| Google Pixel 7 Pro | Use a spudger to gently separate the frame from the display assembly. Take care not to damage the delicate internal components. |
Careful adherence to the specific replacement procedures for each phone model is crucial to ensure a successful repair. Following the manufacturer’s recommendations or a reliable online guide is highly advised.
Screen Protection and Prevention
Protecting your phone’s screen from damage is crucial for its longevity and usability. A cracked screen not only impacts the aesthetic appeal but also reduces functionality and can lead to further damage. Proactive measures, such as using screen protectors and cases, are vital in preventing costly repairs.Screen protection is more than just a preventative measure; it’s an investment in preserving the value and functionality of your device.
By understanding different types of screen protectors, installation techniques, and preventive measures, you can significantly reduce the risk of screen damage.
Screen Protectors: Types and Installation
Screen protectors come in various materials and designs, each offering different levels of protection. Choosing the right type depends on your budget and desired level of protection. Tempered glass, for instance, provides exceptional scratch resistance and impact protection, while plastic protectors offer a more budget-friendly alternative. Some protectors are also designed to enhance screen sensitivity.
- Tempered Glass: This type of protector is renowned for its strength and scratch resistance. It is significantly more durable than plastic protectors and can withstand moderate impacts. The glass is chemically treated to increase its strength and resilience, making it a popular choice for those seeking maximum protection.
- Plastic: These protectors are more affordable than tempered glass, but they typically offer less protection against scratches and impacts. They are often a good starting point for those who want basic protection without a high price tag. While less durable, they are often easier to install.
- Installation: Proper installation is crucial for maximizing the effectiveness of a screen protector. Always follow the manufacturer’s instructions carefully. Clean the screen thoroughly to remove dust and debris before applying the protector. Ensure that the protector is aligned correctly, and avoid air bubbles by gently smoothing it out.
Protective Cases: Enhancing Overall Protection
Protective cases offer a comprehensive approach to screen protection by providing a layer of defense against drops and impacts. Different cases offer varying degrees of protection, with some providing minimal protection and others offering significant cushioning.
- Choosing a Case: The selection of a case depends on the level of protection you need. A thin case might offer some scratch resistance but little impact protection, while a rugged case will provide significant cushioning and drop protection. Consider your usage habits and the environments in which you use your phone when choosing a case.
- Case Materials: Cases are made from various materials, including polycarbonate, TPU (thermoplastic polyurethane), and leather. Polycarbonate cases are often known for their durability, while TPU cases provide a flexible and lightweight option. Leather cases offer a more premium aesthetic but might not offer the same level of impact protection.
Preventing Cracked Screens: Practical Tips
A comprehensive approach to preventing screen damage involves incorporating several practical tips into your daily routine.
- Handling with Care: Handle your phone with care, avoiding unnecessary pressure or contact with rough surfaces. Carry your phone in a protective case when not in use.
- Avoid Extreme Temperatures: Extreme temperatures can degrade the screen’s quality and increase the risk of cracking. Avoid exposing your phone to direct sunlight for extended periods, and keep it away from heat sources.
- Secure Storage: Store your phone in a safe and secure location, away from potential hazards like sharp objects or areas prone to impact.
- Regular Maintenance: Regularly inspect your phone’s screen for any signs of damage. Promptly address any scratches or imperfections to prevent them from escalating into larger problems.
Warranty Implications
Understanding your phone’s warranty is crucial when considering screen repairs. A cracked screen can impact your warranty coverage, so knowing the terms and conditions is essential for making informed decisions about repair options. This section Artikels the potential implications and clarifies the process for filing a claim.Warranty policies vary significantly between manufacturers and carriers. The terms often define what constitutes “normal wear and tear” versus damage caused by misuse or accident.
This section provides insight into these factors, including examples of situations where a warranty claim might be denied.
Impact of Screen Damage on Phone Warranties
Phone warranties typically cover manufacturing defects, but not always accidental damage. A cracked screen, resulting from a fall or other external factors, is generally considered accidental damage and is often not covered under the standard warranty. However, some warranties might offer limited coverage for specific types of damage.
Warranty Terms and Conditions for Screen Replacements
Manufacturers and carriers often Artikel specific terms and conditions for screen replacements under warranty. These terms may include:
- Limitations on Coverage: Warranties may exclude damage caused by misuse, accidents, or unauthorized repairs. The extent of the damage, such as a hairline crack versus a shattered screen, can also influence the warranty’s application.
- Exclusions: Many warranties explicitly exclude damage resulting from water damage, drops, or other incidents. The warranty document will specify these exclusions.
- Proof of Purchase: Original purchase documentation is typically required to validate the warranty claim. The warranty might require you to provide a copy of the receipt or invoice.
- Time Limits: Warranties usually have a specific duration. The period of coverage is defined in the warranty agreement.
Situations Where a Warranty Claim Might Be Denied
A warranty claim for a cracked screen might be denied under various circumstances. Examples include:
- Mishandling or Abuse: If the damage is due to misuse or excessive force, such as dropping the phone from a significant height or intentionally damaging the screen, the warranty claim will likely be denied.
- Unauthorized Repairs: Attempting to repair the screen yourself or having it repaired by an unauthorized service provider may invalidate the warranty, as these actions could affect the device’s original functionality.
- Normal Wear and Tear: A warranty typically does not cover damage that results from normal use, like minor scratches or scuffs. A significant crack caused by everyday use is not typically covered.
- Failure to Maintain the Phone: Damage caused by improper care, such as exposure to extreme temperatures or excessive moisture, may not be covered.
Filing a Warranty Claim for a Cracked Screen
The process for filing a warranty claim for a cracked screen typically involves the following steps:
- Gather Required Documents: Collect your phone’s purchase receipt, warranty information, and any evidence of the damage (e.g., photos of the cracked screen). Documentation is crucial for a successful claim.
- Contact the Manufacturer or Carrier: Follow the manufacturer’s or carrier’s instructions for filing a warranty claim. This often involves contacting their customer support department.
- Provide Necessary Information: Be prepared to provide details about the damage, the date of purchase, and any relevant information regarding the incident.
- Follow Up: Monitor the status of your claim and communicate with the support team if necessary.
- Potential for Repair or Replacement: Depending on the extent of the damage and the terms of the warranty, you may be eligible for a screen replacement or other repair services.
Alternative Solutions
Sometimes, a cracked screen isn’t a death sentence for your device. For minor damage, temporary solutions can buy you time and potentially prevent further issues. These solutions are not always a permanent fix, but they can offer a valuable reprieve.
Temporary Screen Protectors
Temporary screen protectors are a practical approach for minor cracks. They provide a layer of protection against further damage and can significantly reduce the risk of screen shattering completely. Different types of protectors offer varying levels of protection. A clear, flexible plastic protector can be effective for preventing additional scratches and minimizing the visibility of existing cracks.
Repair Kits
Repair kits, typically containing adhesive patches and screen repair tools, are designed for specific types of damage. They are effective in stabilizing minor cracks and preventing the spread of the damage, often used in conjunction with a temporary protector. These kits often come with detailed instructions for application and maintenance.
Feasibility and Effectiveness
The feasibility and effectiveness of these temporary solutions depend heavily on the extent of the damage. For hairline cracks or small chips, these methods can be highly effective in preventing further degradation and offering a temporary solution. However, for larger cracks, these solutions might not be sufficient, and a professional replacement might be necessary. Consider the severity of the damage before committing to a temporary solution.
The temporary fix is only a means of providing a delay until a permanent solution is implemented.
Types of Damage and Temporary Solutions
- Hairline Cracks: These are often addressed effectively by a combination of a screen protector and a repair kit. The protector provides a protective barrier, while the kit helps reinforce the weakened area, preventing further spreading.
- Small Chips: A repair kit can usually address small chips by reinforcing the affected area. A screen protector further strengthens the repair.
- Moderate Cracks: For moderate cracks, a repair kit might not be sufficient on its own. Using a screen protector with a repair kit could provide some relief. The best approach for moderate damage is careful consideration of professional or mobile repair services.
- Significant Cracks: Significant cracks often necessitate professional repair or replacement. Temporary solutions might not be sufficient in preventing further damage or maintaining the integrity of the screen.
Creating a Temporary Screen Protector
Creating a DIY temporary screen protector involves careful preparation and execution. Carefully select a clear, flexible plastic material (like a thin plastic sheet from a packaging or a transparent, flexible film). Cut the material to the appropriate size and shape for your screen. Apply a thin layer of adhesive (like a strong adhesive tape) to the back of the material, and position it carefully over the damaged screen.
Avoid any air bubbles during the application process. The protector should be well-secured to prevent movement or damage. This is a temporary fix, and it’s not a replacement for a proper repair or replacement.
Parts Availability and Sourcing
Finding the right replacement screen for a cracked phone depends heavily on the phone model’s availability. Older models might have fewer readily available parts compared to newer ones, impacting repair costs and timelines. The availability of compatible parts directly influences the feasibility and cost of a repair.
Availability of Replacement Screens
The availability of replacement screens varies significantly based on the phone model and its production lifespan. Newer, more popular models typically have a wider range of readily available parts, while older models may require more specialized sourcing. This difference in availability reflects the market demand and the manufacturer’s support for older devices. The market for repair parts often mirrors the overall demand for the corresponding phone models.
Sourcing Replacement Parts
Securing replacement parts involves several avenues, each with its own considerations. Online marketplaces and dedicated repair part retailers are common starting points. Reputable suppliers often provide detailed compatibility information to ensure accurate replacements. Additionally, some phone repair shops or mobile repair services may have direct partnerships with suppliers, potentially offering faster turnaround times. The best approach depends on the specific needs and requirements of the repair.
Finding Reliable Suppliers, Cracked screen replacement
Choosing a reliable supplier is crucial to ensure the quality and compatibility of replacement parts. Online reviews, ratings, and customer testimonials can provide valuable insights into a supplier’s reputation. Checking for certifications and industry recognition can further validate a supplier’s reliability. It is important to verify a supplier’s ability to provide the exact part needed for a particular model and to have a clear return policy.
Potential Suppliers for Phone Screen Replacement Parts
- Online Marketplaces: Websites like eBay, Amazon, and specialized online stores frequently offer replacement parts for various phone models. However, careful scrutiny of seller ratings and product descriptions is vital to ensure authenticity and compatibility. Buyer protection policies should also be considered.
- Dedicated Repair Part Retailers: These retailers often specialize in providing repair parts for various electronics, including mobile phones. These retailers may offer a more curated selection of parts and potentially better technical support.
- Mobile Repair Shops/Services: Many mobile repair shops maintain relationships with reliable suppliers. They might offer a wider range of parts and potentially faster turnaround times compared to online retailers, but repair costs may vary. It is essential to consider the shop’s reputation and repair quality.
- Manufacturer-authorized repair centers: Authorized repair centers offer parts and services directly from the phone manufacturer. These centers usually provide genuine parts and ensure compatibility, though their pricing may be higher than alternative options. This is an excellent option if warranty implications are a concern.
Safety Precautions and Troubleshooting
Replacing a cracked phone screen involves potential hazards. Careful handling and adherence to safety precautions are paramount to preventing injury and ensuring a successful repair. Proper troubleshooting is also crucial for identifying and resolving any issues that may arise during the process.Understanding the potential pitfalls and having a structured troubleshooting approach is vital for a safe and effective screen replacement.
This section details essential safety precautions, common troubleshooting steps, and how to address problems with the new screen or adhesive.
Safety Precautions During Screen Replacement
Proper safety precautions are critical to avoid injury during the repair process. These precautions include wearing appropriate safety gear, working in a well-lit area, and handling components with care. Static electricity can damage electronic components; using an anti-static wrist strap is highly recommended.
- Wear safety glasses to protect your eyes from flying debris.
- Use an anti-static wrist strap to ground yourself and prevent static electricity from damaging components.
- Work in a well-lit area to ensure you can clearly see what you are doing.
- Handle all components with clean hands and avoid touching the screen’s internal components directly.
- Disconnect the phone’s battery to prevent accidental electrical shock.
Troubleshooting Common Issues
Troubleshooting common issues that may arise during the repair process is essential for a successful outcome. These issues can range from problems with the adhesive to damage to the new screen.
- Adhesive Issues: The adhesive may not adhere properly to the phone’s frame or the new screen. This could be due to improper cleaning, inadequate drying time, or the use of incompatible adhesive. Ensure thorough cleaning of the phone’s frame and the new screen before applying the adhesive, and follow the manufacturer’s instructions regarding drying time.
- Screen Damage: If the new screen is damaged during installation, it may need to be replaced. A common cause of screen damage is improper handling during the process. Double-check your techniques and be gentle with the new screen.
- Connectivity Issues: Problems with the screen’s connectivity can manifest as issues with touch responsiveness or the display. A careful inspection of the cables and connections is necessary to diagnose this type of problem. Ensure the new screen is properly connected to the phone’s motherboard and that all components are securely fastened.
- Incorrect Calibration: A poorly calibrated screen can result in distorted images, colors, or touch response issues. If you encounter such issues, re-calibration might be necessary, or a faulty screen might need replacement.
Addressing Problems with the New Screen or Adhesive
Addressing problems with the new screen or adhesive involves careful analysis and a methodical approach. The issue could be due to incompatibility, incorrect installation procedures, or damage.
| Common Problems | Troubleshooting Steps |
|---|---|
| Adhesive won’t stick | Ensure both surfaces are clean and dry. Check for adhesive compatibility. Consider using a different type of adhesive if necessary. Inspect the adhesive for damage or expiration date. |
| Screen cracks during installation | Handle the screen with extreme care. Review installation procedures. Check for proper alignment and pressure during application. |
| Touch sensitivity issues | Check cable connections. Ensure the screen is correctly calibrated to the phone’s motherboard. Test different areas of the screen for sensitivity variations. |
| Display issues (e.g., distorted colors) | Check the screen’s alignment. Inspect the connections for any damage or misalignment. Recalibrate the screen if necessary. If the problem persists, the screen might need replacement. |
Last Recap
In conclusion, fixing a cracked screen can be a multifaceted process. From the financial implications to the various repair options, this guide has provided a detailed overview. Whether you opt for a DIY approach, professional help, or a temporary solution, understanding the nuances of cracked screen replacement empowers you to make the best choice for your needs and budget.
Remember to prioritize safety and follow the provided instructions carefully for a successful outcome.
FAQ
What are the typical costs for replacing a cracked screen on an iPhone 13 Pro Max?
The cost of replacing an iPhone 13 Pro Max screen varies greatly depending on the repair method. In-store repairs can range from $250-$350, while mobile repair services might cost slightly less. DIY kits are the most budget-friendly option, but require more technical skill.
What are some common mistakes to avoid during a DIY screen replacement?
Common mistakes include improper handling of the phone’s internal components, using the wrong tools, or applying the adhesive incorrectly. Carefully following the step-by-step instructions and taking necessary safety precautions will greatly reduce the risk of errors.
What are the different types of screen damage?
Screen damage can range from hairline cracks to complete shattering. Identifying the type and severity of the damage is crucial for determining the best course of action. Cracks, chips, and shattered glass are common types of damage.
Can I file a warranty claim for a cracked screen if I have a protective case on my phone?
Warranty coverage for cracked screens often depends on the manufacturer’s policy. While a protective case might offer some protection, it doesn’t always guarantee coverage. Check your phone’s warranty terms and conditions carefully to understand the specific requirements for filing a claim.


